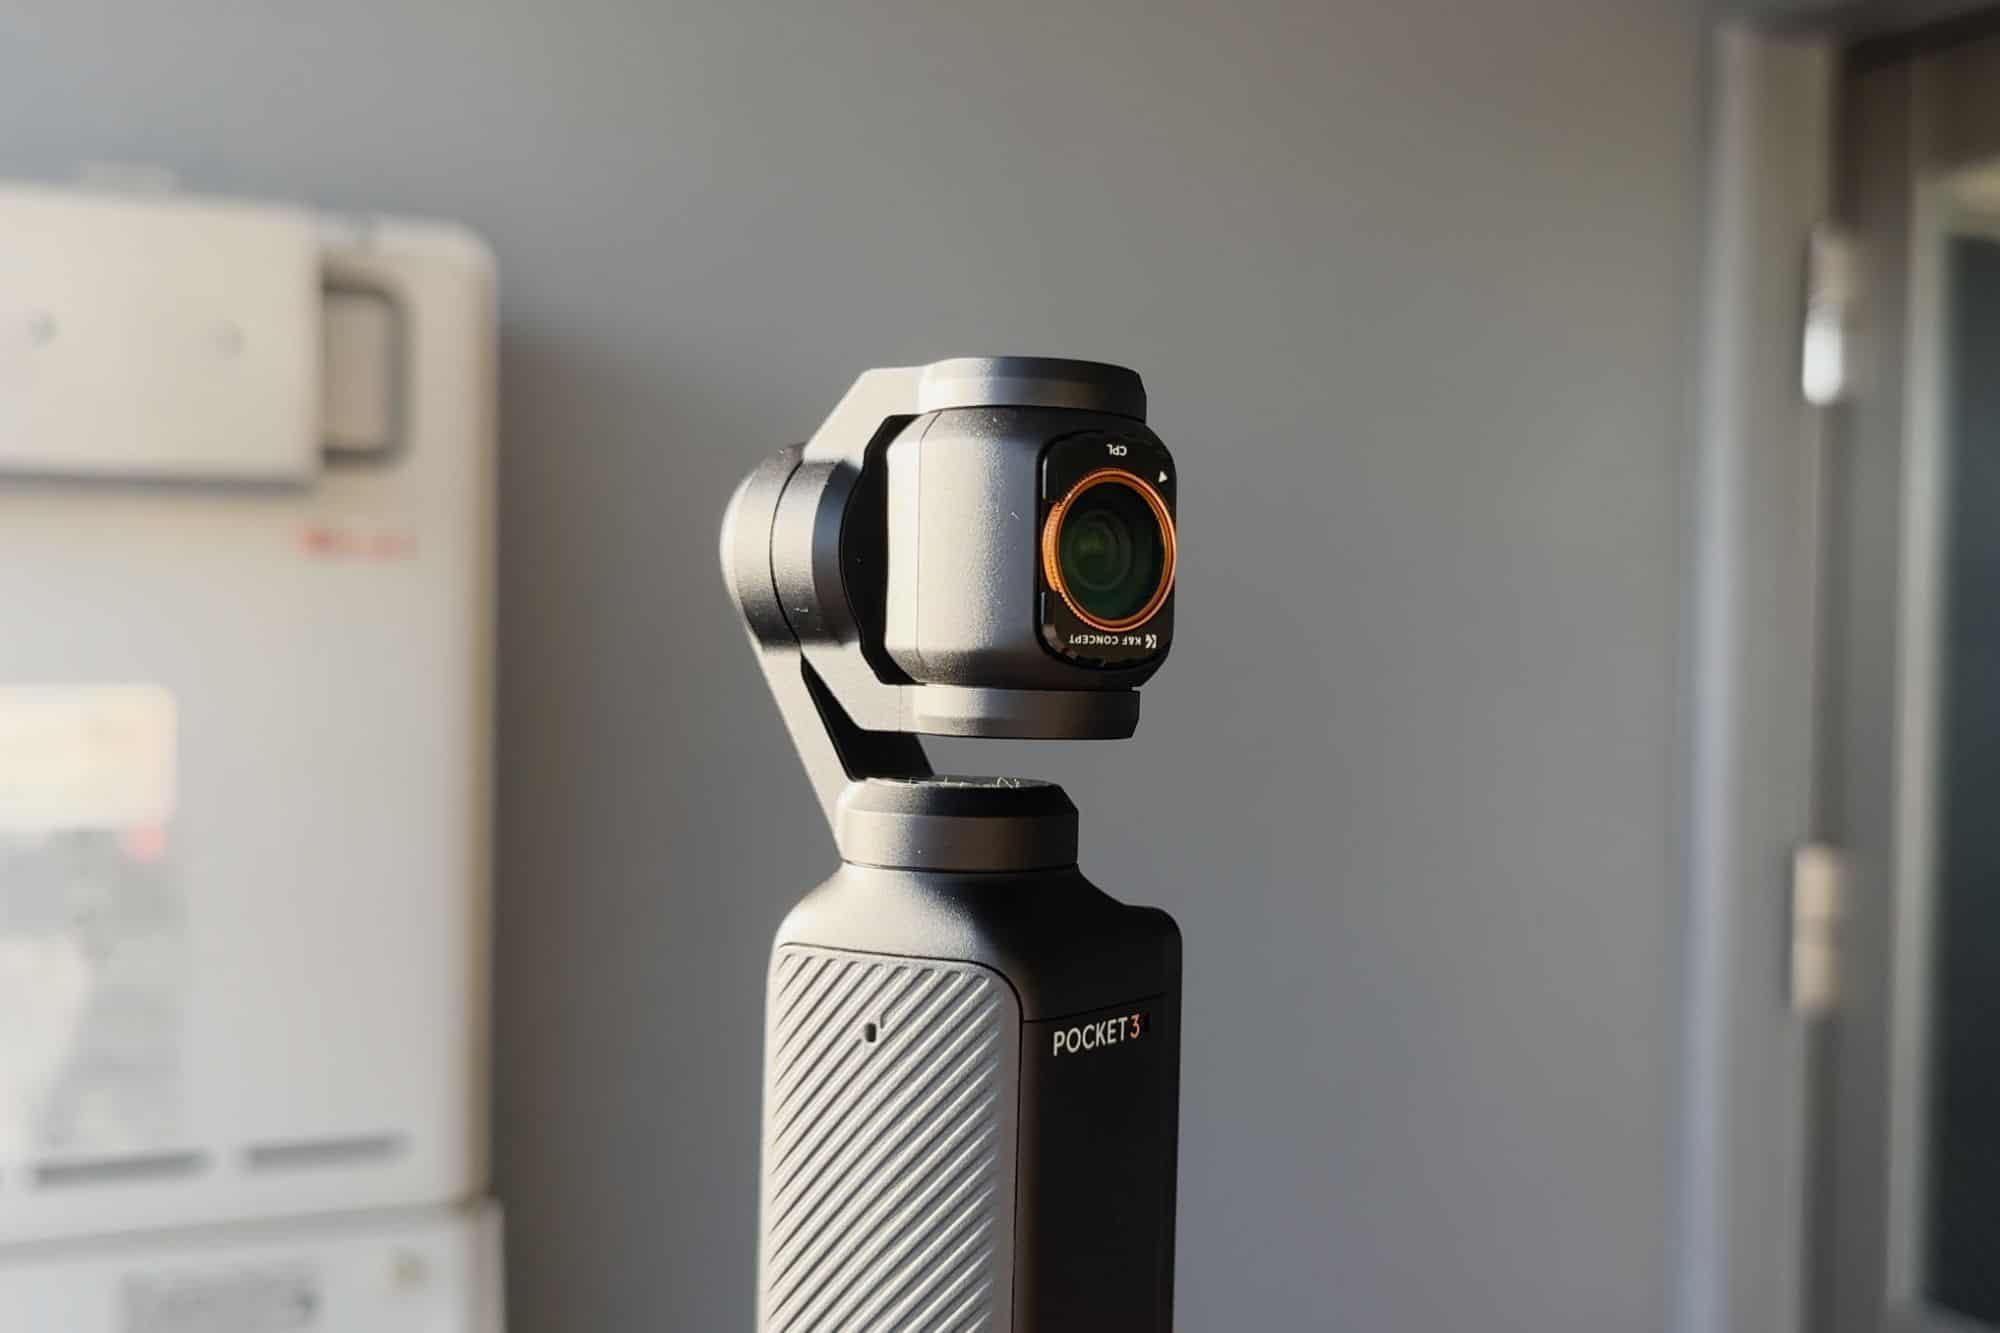
In a previous post, I talked about how ND filters can help you achieve natural motion blur on your Osmo Pocket 3 by enabling you to use much slower shutter speeds in bright conditions—without overexposing your footage. Neutral density filters, reduce the amount of light entering the lens, allowing for longer exposure times for photos or slower shutter speeds in videos.
Now, the pack of K&F Osmo Pocket 3 ND filters I bought also included a circular polarizing filter. This is another very popular type of filter which selectively blocks light waves oriented in certain directions, a property called polarization.
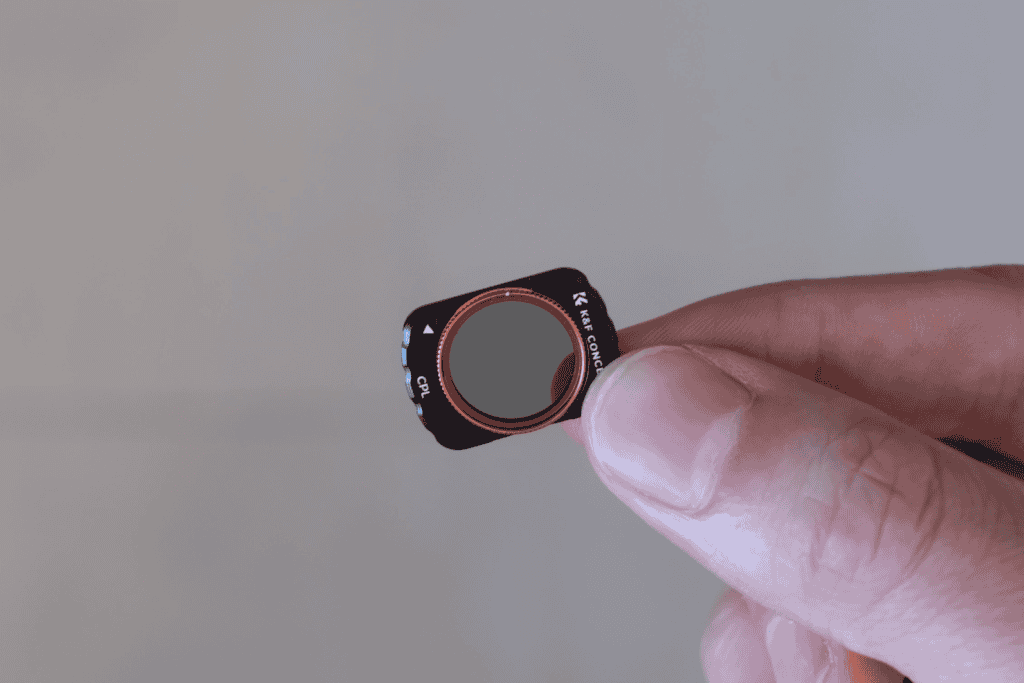
By doing so, it can reduce or eliminate reflections and glare in the scene. This can have a profound impact on your footage that can’t be replicated in post-production. To put polarizing filters to the test and see what difference they can make, I’ve spent the last week or so bringing it everywhere with me and testing it across some of the most common situations where polarizing filters are useful.
But before I show you what difference polarizers make, let me quickly show you how to use them. Like the ND filters, these polarizing filters magnetically attach to the lens of the Osmo Pocket 3. However, they also feature a rotating dial, which allows you to adjust the polarized light you’ll selectively block.
Example #1: Seeing Through Water
It’s a bit tricky to explain in words, so let’s jump to the first situation that calls for a polarizer: seeing through water.
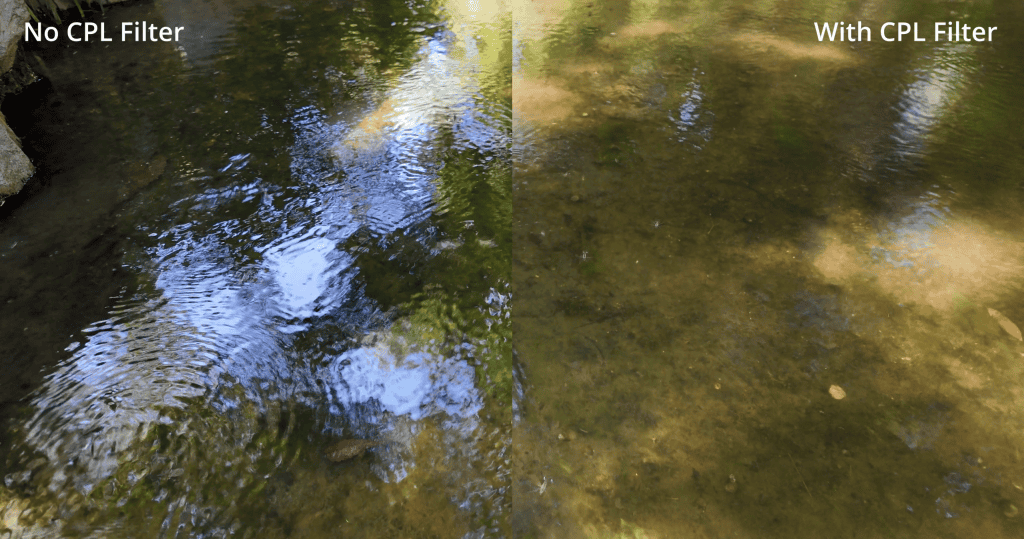
At its highest strength, it cuts through glare and reflections on the water’s surface, revealing the details beneath. An important thing to note about polarizing filters is that their effectiveness in reducing glare and reflections depends on several factors, such as how polarized the reflected light is, the angle of reflection, and the smoothness of the reflecting surface. This is why it’s better at reducing glare from calm water rather than rippling water, which reflects light from multiple angles and directions.
Example #2: Reducing Reflections From Glass
Another very common reason to use a polarizing filter is to eliminate or at least reduce reflections coming off glass. Like with water, when light hits glass, it often reflects in a way that polarizes the light, which the filter can then block. The effectiveness of the CPL filter will depend on the angle of the light’s reflection.
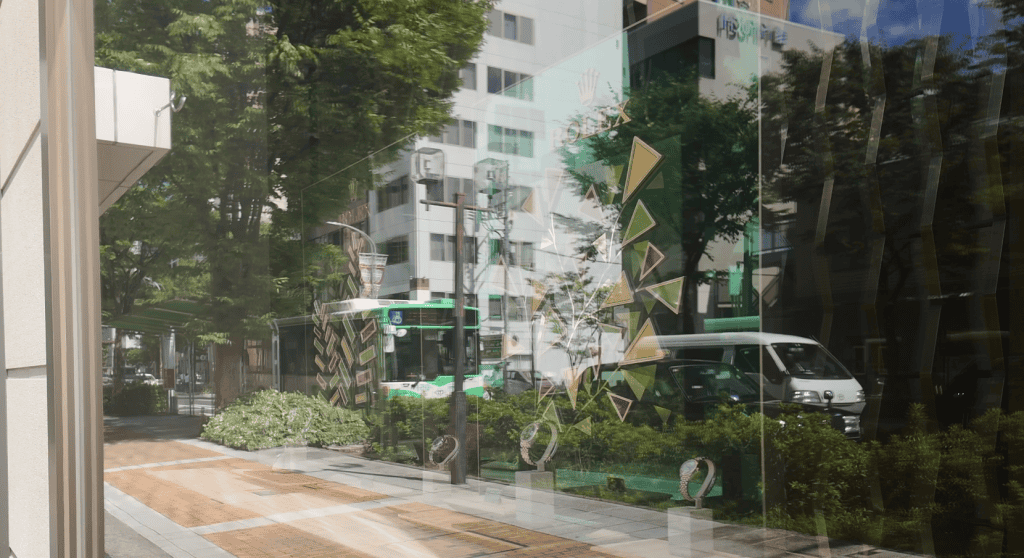

For example, there’s a specific angle called Brewster’s angle — for glass, this is about 56 degrees — where the reflected light is perfectly polarized. At this angle, the polarizing filter works best, significantly reducing reflections. However, if you’re shooting straight on, where the angle of incidence is zero degrees, the reflected light isn’t polarized at all. In this case, the filter won’t be very effective at reducing reflections – no matter how much you spin the polarizer.
Example #3: Enhancing Foliage
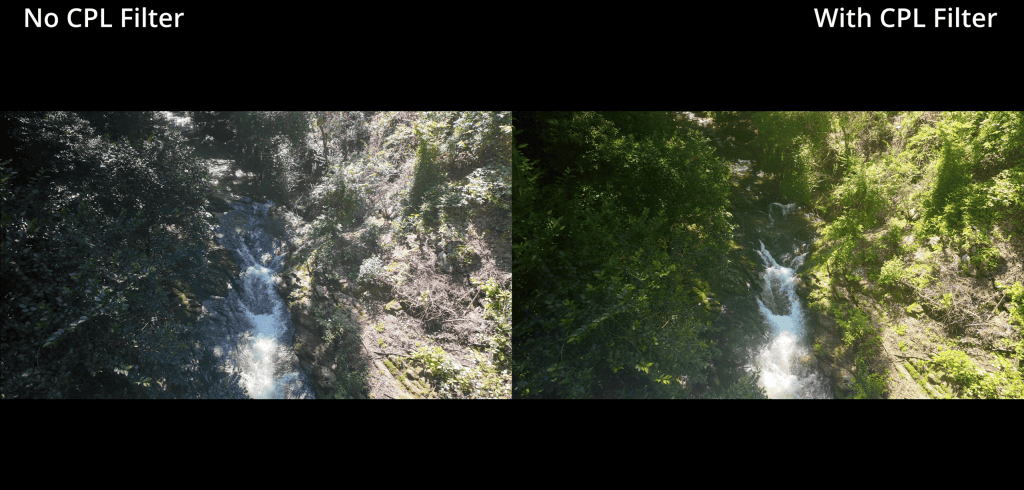
Using a polarizing filter also made a big difference to my footage involving foliage. Leaves reflect a lot of light, and the CPL filter reduces these reflections, allowing the true color of the leaves to show through. With less glare and more contrast, the footage often looks much more saturated, with richer and deeper greens.
Example #4: Bluer Skies
On my mirrorless camera, I sometimes used a polarizer to give a whitish washed-out sky some pop and make it look more blue, as well as enhance the details of clouds. This is actually a very common reason to use a polarizing filter: to deepen your skies.

However, I don’t think this is a particularly good use case for a polarizing filter on the Osmo Pocket 3. Why not?
Firstly, the Osmo Pocket 3 already has a standard color profile with vivid and saturated colors, so the skies are already quite blue. Using a polarizer can often make the blues look too dark and unnatural.
Secondly, the Osmo Pocket 3 has an ultra-wide-angle lens with a 20mm full-frame equivalent focal length. Using polarizing filters with such wide-angle lenses can cause the sky to have uneven tones. Parts of the sky may appear deep blue, while other parts look lighter. Why is this the case?
Well, if you’ve done outdoor photography with a polarizing filter, you might know about the 90-degree to the sun rule. This rule states that a polarizer is most effective at reducing haze and deepening the blue sky when the camera is positioned at a 90-degree angle relative to the sun.
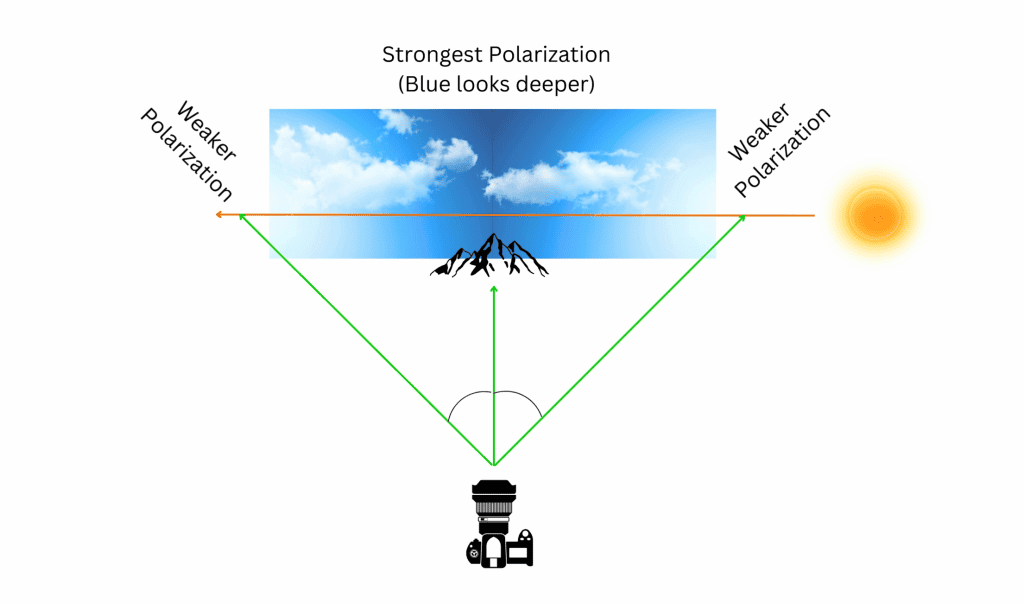
However, with an ultra-wide lens like the Osmo Pocket 3’s, we’re capturing a much broader expanse of sky. This means that while part of the sky might be at that ideal 90-degree angle to the sun, other parts are not. The result is an uneven polarization effect across the frame.
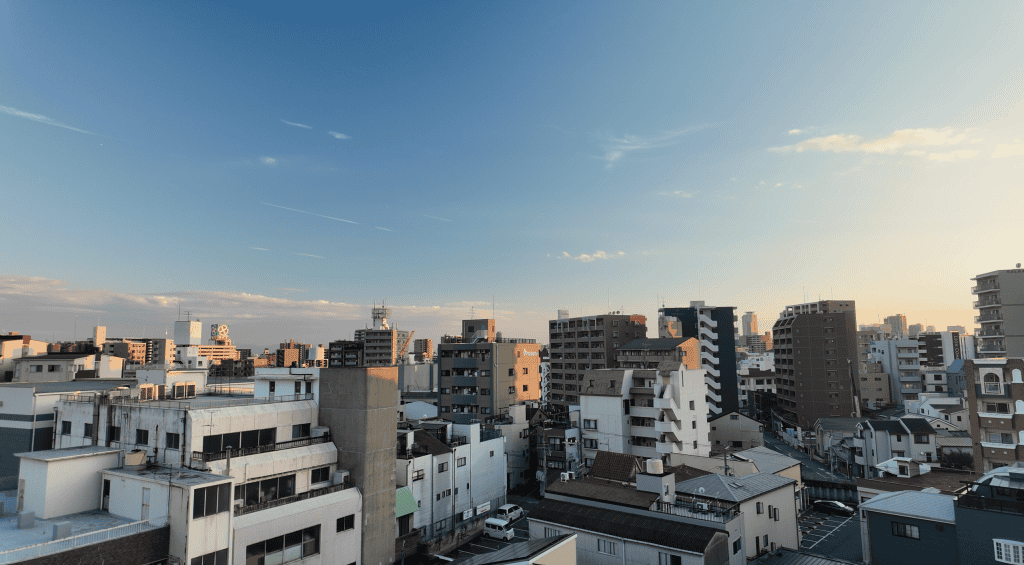
What you’ll often see is a gradient effect in the sky: the deepest blue will appear directly in front of you (where the 90-degree rule is in effect), while the edges of the frame will show lighter blues. This uneven toning can look unnatural and distracting, especially in video where the effect might shift as you move the camera.
A side-effect of CPLs: 1-2 stops of light reduction
Now, one important thing to note about polarizing filters is that while their purpose isn’t to simply cut down light like ND filters, a side effect is that they reduce the amount of light entering the lens by about one to two stops. This means less light reaches the camera sensor.
During the day, this usually isn’t a problem. However, in darker settings, using a polarizing filter can cause the camera to increase the ISO setting to compensate for the reduced light, which can lead to more noise in your footage. So, it’s something to keep in mind when choosing when and where to use a CPL.
Conclusion
Overall, I feel like polarizing filters can be a very useful accessory for your Osmo Pocket 3, although they are very situational.
As I covered, there are clear scenarios where they make a lot of sense: eliminating reflections from glass, removing reflections from the surface of water, and enhancing contrast and saturation in scenes with a lot of glare. But they must also be used with care, and as I showed, CPL filters can sometimes create unnatural-looking skies. Reflections also often add to the scene, so it’s essential to consider whether you really want to remove them.
